Four Facet Sharpening of Small Twist Drills
Click on images to view them in larger size and more detail.Back in December 2003, I wrote on experiences using a jig designed by Mr DAG Brown [ME1] to enable twist drills up to 1/2" size to be sharpened by the Quorn cutter-grinder using the four and six facet method. The device worked well and I went on a drill sharpening jag that has kept me happy for the past six years or so. As observed at the time, the jig has limitations making it impractical for use on drills much under 1/8 on an inch (3mm thereabouts). Mr Brown himself understood this problem and designed a different jig which would apply the four facet sparpening method to twist drills from about 0.10" down to 0.01", or 2.5mm to 0.35mm. That represents drills in the range #38 to #80 if that places it in perspective for you. This seemed like a fine thing and I duly promised myself I'd build one, someday.

Needless to say, that day was slow to arrive and may never have arrived had it not been for an impulse to "go metric" in the drilling department by buying a set of "Asian" drills ranging from 13mm to 1mm in 0.1mm steps. Sadly, many of the smaller drills in this set have been very poorly ground and have virtually no back-off, meaning that the force required to make them "cut" is very high, making breakage more likely. In fact, some of them just won't cut at all. Even worse, this was not the first time I'd been caught like this. The stand of TIN coated number drills also seen in this photo suffers from the same malady. Somehow I managed to unlearn the lesson that when it comes to drill sets, price is proportional to quality. But apart from their inability to actually drill a hole, the drills themselves however seemed basically ok, so if they could just be touched up and some rake ground into them, life would be good and the money spent would not be totally lost.

To understand how the jig works, we better do a quick review of how standard "jobber" drills are ground, and how the four facet method differs from this. Jobber drills are normally ground with an included lip angle of 118° This is not an arbitrary figure; it and the helix angle (the "twist") are matched to result in correctly formed cutting faces, so that 118° figure cannot vary by much without adversely impacting the strength of the cutting edges and their ability to cut.
Just like lathe tools, the cutting edge of a twist drill needs relief behind the edge if it is to cut. As explained in the earlier article, this is conventionally achieved by a method called "conical back-off". Commercial devices exist to apply this to drills in the shop, though they start to become rather inadequate as the size of the drill decreases. The diagram here shows the effect of conical back-off in providing the required relief from cutting edge to heal.
But as described in the other article, a perfectly effective tip geometry can be arrived at by grinding the drill tip using four, or even six flat, intersecting planes. The problem in applying this to smaller drills is holding the drill with sufficient support that the drag of the grinding wheel does not deflect it and destroy the intended geometry. As we'll see, Mr Brown's jig for small drills addresses this problem perfectly, at the expense of a lessening in precision and an increase in the degree of operator proficiency required.

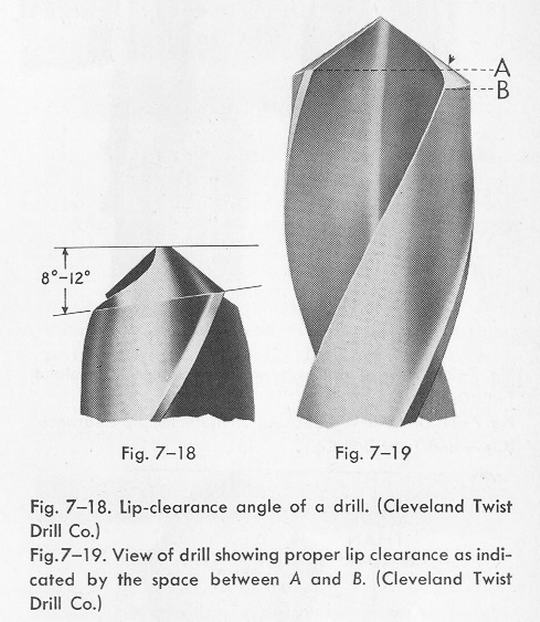
The jig comprises a block containing two rectangular channels. Each channel is milled at 59° to the vertical, or one half the included angle for our drills. This allows a drill held perfectly concentrically in a holder to be removed and reinserted at 180° so each side of the drill tip can be ground. The holder is made rectangular to decrease the danger of only rotating it 90° rather than the required diametrically opposite orientation. Now notice the two other angles on the holder imposed by the sides of the jig. the "steep" one is set to position the axis of the drill at 25° from the vertical. This provides about the same amount of lip-clearance as conical back-off, but would result in a cutting edge that is too acute and so rather prone to premature wear, not to mention an increased tendency to "grab". That's why the other face is milled so we can apply a smaller degree of lip clearance (10°), thus forming the second pair of facets and a strong cutting edge.

Here's the completed device. A frame holds a diamond honing plate. A pair of rails supports and guides the jig about 0.03" above the hone. So we drop our tool holder collet (more on that in a minute) into the "steep" channel and stroke away to form the overall lip-clearance equally on both sides. Then we drop it into the other channel and give it a couple of strokes to form the cutting edge facets. Obviously, there is no way of assuring that we've managed to sharpen the drill such that the lips are of equal length. That is all down to operator skill, good eyesight, and strong magnification. Likewise, stroking the precise amount on the cutting lip facets so that the correct four facet geometry is achieved (ie, they all meet at the axis of the drill) requires practice and skill, but it can be done. I won't tell you how many unusable jobs I produced learning to get it right—it's embarrassing.

Here we see the holder, some drills, and some other collets (two of which are yet to be slit). I deviated a little from the DAG Brown design in using 3/16" drill rod stock for the collets (his called for 9/64" drill rod). This allowed me to increase the capacity up to a #38 drill, as opposed to a #42 as drawn [ME2]. This required a larger clamp screw (1BA instead of 2BA) and maintaining the 1/4" square shape over the internally threaded portion at the end of the holder. As you can see, the collets have a tapered tip which matches a taper in the holder produced by a D-bit with a 30° included angle. So each collet will hold a range of drills dependant on the size of the hole in the end and the width and number of slits cut in the collet. The three collets shown should hold drills down to #60. Smaller than that I don't care to go right now.
The important thing about this component is that the collets are drilled concentric with the raw material, and that the hole in the rectangular holder is precisely on its axis. Even a couple of thou off would make it almost impossible to produce symmetrical cutting lips. In addition to positioning the drill on the axis of the holder, the collets allow the drill to be held firmly very close to the tip, thus providing the required support against deflection during honing—a vital feature as the drill size decreases.
It should be obvious that the orientation of the lips (or lips to be) of the drill when gripped in the holder is critical. The correct position is with the lips parallel to the "long" sides of the holder. I used a 4x magnification head band while developing my sharpening skills (or destroying perfectly good drills if you prefer). This is marginal to inadequate. Mr Brown suggests using a 20x jewelers' loupe and I'd have to agree. My eyes are about as shot as those of your average bloke halfway through his sixth decade and I certainly would not want to try sharpening anything under a #44 without better magnification. The danger is that your results are not symmetric, meaning one lip is longer than the other, meaning that the drill cuts an oversize hole and tends to wander off axis as it drills.
This is easy to test. I started with one of those miserable TIN coated number drills (#41). First I tried drilling a test hole in the end of a piece of drill rod. Pointless. In its native state, that drill just would not cut. Next the drill was sharpened (and sharpened—but I'm getting better) and the test repeated. Now it cuts and cuts very nicely with chips emerging from both flutes, suggesting both lips are cutting. The big test is to now try inserting the shank of a #40 drill in the hole. Amazing! It won't fit! This indicates that the sharpened drill has cut very close to size. Just to be sure, I repeated this test using an expensive #40 drill with the same result. This indicates the TIN coated drills are not awful quality in respect of size; they are just poorly ground. A further test with a sharpened #38 bit and #37 test shank produced the same results.
So the device is a success, though I stress that learning to use it is not something I achieved instant success at. Also, my headband magnifier is inadequate and I need something much stronger, especially if I ever get so adventurous as to try sharpening down in the sub #60 range. As to the efficacy of the diamond hone plate as a grinder, I took a broken 2.3mm drill and flat ground the tip. Producing the first facets, and so producing the 118° tip angle, took about twenty strokes per side. Putting on the lip facets was complete with just four strikes per side.
My diamond plate is called a #201 EZE LAP, "Fine" grade. The original article suggests using a special two sided plate with 25 micron grade on one side for roughing, and 6 micron on the other for fine sharpening. The source of this plate was given as Clifford Northfield Ltd (UK). The company exists, but appears to have no web nor email presence and I've forgotten how to write and post letters—or perhaps just lost patience with this archaic method of communication—so can't say if the special plate is still available. Still, I'm happy enough with what I have and have confidence that I can re-sharpen all of those small size drills in this jig, and the larger ones on the Quorn—provided I live that long.
In conclusion, this device could really save your day if you have a badly blunt, or broken drill and need to make that hole NOW. It will also "fix" badly ground drills, but I think it would be better to spend the extra bucks and get good quality drills in the first place.
References:
| [ME1] |
Brown, D: Four Facet Drill Sharpening: Extending the Range, Model Engineer, Nexus Speciality Publications, England, Volume 177, Number 4025, 20 Sep-3 Oct, 1996, p313. |
| [ME2] |
Brown, D: Sharpening Small Drills, Model Engineer, Nexus Speciality Publications, England, Volume 184, Number 4119, 5-18 May, 2000, p518. |
Email: Ron Chernich
