Building the Little Dragon, Page 6
Click on a photo to view it larger size.
Piston
The 1950 instructions suggest three options for the piston material and construction: lapped hardened steel, ground cast iron, and "cold broached" aluminium. These are respectively rated best, good, and fair. The "cold broach"
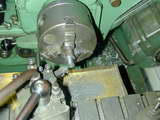 Piston 1.
 |
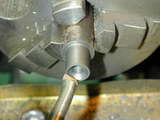 Piston 2.
 |
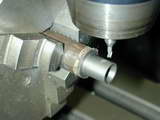 Piston 3.
 |
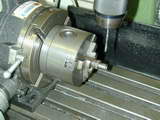 Piston 4.
 |
 Piston 5.
 |
 Piston 6.
 |
- A stub of cast iron rod is turned down to about 0.0015" larger than the finished liner bore for the required length, plus a parting-off allowance.
- The piston interior is finished by drilling and taper turning at 30° until the skirt lip is about 1/32" wide. If you have a 1/4"
slot drill, use that to flat-bottom the interior cavity to further lighten the piston.
In the US, these are called "two flute end mills". In other English speaking countries they are marked, known, and sold as "slot drills".
- To drill the wrist-pin hole, I pass a small milling cutter (2mm) across the piston to barely kiss the surface. The drill point can the be visually set in the middle of the tiny flat produced. This is quite accurate enough for the lateral position. The longitudinal position is also important as this, in conjunction with the height of the piston above the hole in this case, sets the timing. The most important alignment of the hole is that it be at right angles to the piston axis. If it is not, it will force an angle into the conrod and friction will rise.
- After center drilling, drill through 7/64", then ream 1/8". The design called for thick walled brass tubing for the wrist pin. I suggest using brass rod. You can drill through 1/16" if you wish. The ends should be rounded and polished as the pin if of the "fully floating" type.
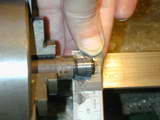
- This photo shows a perfectly acceptable way of finishing a piston to size, provided that the amount to be removed is less than 0.002". More than this and there is a danger of producing a barrel rather than a cylinder. The required finish is achieved by pressing a well oiled piece of 600 grit glasspaper against the work with a flat piece of steel while spinning it at about 300 rpm. Obviously this photo is posed, or I'd have broken several of those fingers!
I tried an experiment: finishing before parting off. I thought this would be bad for several reasons. As it turned out, it was--for all the reasons anticipated! So before finishing, part off to length and fit the piston to a mandrel so it can be offered up to the bottom of the bore, crown first. Aim for a fit that goes tight to finger pressure just after the piston closes off the exhaust. And be sure to clean and oil the piston before each trial fit.
A note to prospective builders on the piston height: As drawn in MAN, and copied for the MEN CD plan-set, the piston skirt will be precisely at the bottom edge of the liner when at BDC. Since this also marks the end of the blind bore in the case for the liner, it's entirely possible that given measurement tolerances and things, the piston may hit the bore face just before BDC, preventing the engine from turning over. Mine did this, as did one built by a MEN reader from our plan set. You can lower the drawbridge, or raise the moat. In this case raising the moat by turning a few thou off the piston height is the simplest solution. Be sure to clean the piston afterwards and lightly debur the circumcised edge by touching it lightly to an oilstone while still in the chuck (adequately protected from the jaws by drink-can shim). Mine only needed 10 thou removed to achieve clearance.
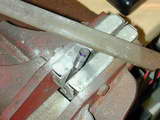
- The last precision operation on the piston is to form the loop scavenge deflector on the piston with a large file. The plan says it's 1/16" high and 1/8" wide. The latter is not that important, but the height is. Too low and transfer will open too early. And be sure to think three times about where it must be in relation to the wrist pin before applying the file to the job. Note the piston is still mounted on the mandrel used to hold it for finishing and this is what is being gripped in the bench vise.